This is a brief primer on how to use the Film Goblin WordPress editor. It is a mix of style and technical elements until a full style guide is complete.
Post Title
Post Titles should convey the jist of the article in a way that will get people to click on them. We’re are not doing clickbait but we are trying to gain an audience.
Uppercase every word in the title
i.e. How To Publish On Film Goblin
ALL CAPS titles of movies, shows, books, games, franchises, etc in the title.
i.e. SOLO : Where the STAR WARS Saga Crashes Into The Mountain
Use a Modifier for things like Reviews, Trailers, Previews, features like Behind The Scenes (“BTS”), etc.
Use a colon to separate what the article is from any Descriptions.
Add Modifiers for the Modifier such as “New”, “Final”, etc.
i.e. THE SHINING BTS : Everyone Loses Their Mind At The Overlook Hotel
i.e. BLACK PANTHER Final Trailer : This Thing Goes To Woke
i.e. THE COMMUTER Review : This Death Train Has No Brakes
Do not use quotes in the Post Titles unless the Title contains:
- A direct quote from someone. Use double quotes.
- A phrase that needs to quote because it’s irony or something. Use double quotes.
- The name of an episode of a show. Use double quotes.
Permalink
The Permalink is what we use to format the URL of the article. WordPress automatically generates a Permalink but they are often very long and clunky so you will probably want to edit it by clicking on the “Edit” button.
The Permalink should convey what the article is about but can be shortened.
i.e. “how-to-publish-on-film-goblin” can be shortened to “how-to-publish”
i.e. “black-panther-final-trailer-this-thing-goes-to-woke” can be shorted to “black-panther-final-trailer-is-woke”
The Permalink should NEVER be generic such as “black-panther-final-trailer” as two Goblins may do an article on it.
DO NOT CHANGE THESE ONCE YOUR ARTICLE IS PUBLISHED LIVE TO THE SITE. IT WILL SCREW UP THE SPIDERING OF THE WEBSITE.
Featured Image
Every article on the site needs a Featured Image. It is used as the background for the article whenever it appears on the site.
When you find a Featured Image it should be interesting and evocative of the article.
Featured Images Dimensions
Always use JPGs.
It should also be large and rectangular in dimension, about at least 1000px by 500px. The image can be taller and wider but avoid using a massive 2000px wide image.
If you have a larger image just reduce it with an online photo editor, a list of which you can find here:
http://www.techradar.com/news/the-best-free-online-photo-editor
Featured Image File Size
Additionally the file size (KB) should be as small as possible without sacrificing image quality. This is critical as large file sizes contribute to a slow download time which Google will penalize us for.
Find some image size reducers here:
https://enviragallery.com/9-best-free-image-optimization-tools-for-image-compression/
How To Upload Your Featured Image
Bottom right on the Editor is a box called Featured Image.

And then just upload your image. Do not set a Caption but you can set the Alt Text.
MAKE SURE YOU TITLE YOUR IMAGE INSIDE THE MEDIA LIBRARY SOMETHING THAT IS RELATED TO THE ARTICLE.
i.e. “black-panther-final-review-1”
This way we can easily find the image later by searching for it through the library.

Using The Editor Or Actually Writing Your Article
First, so we don’t sound like moronic AICN hacks we should use some grammar, spelling and style tools.
https://www.codeinwp.com/blog/grammarly-vs-jetpack-vs-ginger-vs-hemingway-for-wordpress/
I suggest Hemingway and will install Jetpack. You will have to manage your own Jetpack settings inside your WordPress profile.
The Editor
The editor is pretty straightforward. You can open additional features that you might need by toggling the Toolbar Toggle button.
You will likely not need any of these features except Special Characters, Indent and Undo.
DO NOT CHANGE ANY COLORS OR FONT FACES. NONE.
Some Quick Style Pointers
- Always put some text first. We don’t want images bumping up against the Featured Image.
- Do not reuse the Featured Image.
- Write your normal text in Paragraph.
- Make titles of Franchises, Books, Movies, Bands, TV Shows, Video Games, etc Bold and Italic. Don’t treat the names of magazines, people or companies. Use single quotes for Episodes or Songs.
- Keep your paragraphs short. People do not read at all these days. If you change an idea or a concept, make a new paragraph. If you want to make some impactful statement make a new paragraph.
- Use Sub-Headers, like I am using in this article, for long posts. It helps break up the stream of text. It keeps people reading.
- Uppercase all the words in a Sub-Header.
- Learn to use The Header / Paragraph toggle. It at the top left of the editor. Sub-headers should be set to Heading 2. The regular text should be set to Paragraph. This will take a while to get used to as WordPress will mess with the formatting.
TIP: If the Heading 2 format is selecting more than the text you intended, create more space around it, format your text correctly and then delete the space. - If you have Sub-Headers within your Heading 2 text blocks then use Heading 3.
Put the name of the actor playing a character in paraphrases after the characters name.- Tighten up all of your text. Remove any extra spacing between paragraphs, between Heading and paragraphs, paragraphs and images. This might take some time to get used to.
Do not use quotes in the article body unless it’s:
- A direct quote from someone. Use double quotes. If it’s a impactful statement, use the Blockquote feature.
- A phrase that needs to be quoted because it’s irony, phrase or something. Use double quotes.
- The name of an episode of a show. Use double quotes.
If you don’t see something here and way to know how it should be done go look and see how BMD does it.
Adding Single Images
OK, so this was not that straightforward at all.
The objective here is to post consistently-sized, high-quality, low-kilobyte images that do not require WordPress to resize them. Resizing leads to degradation of the image quality.
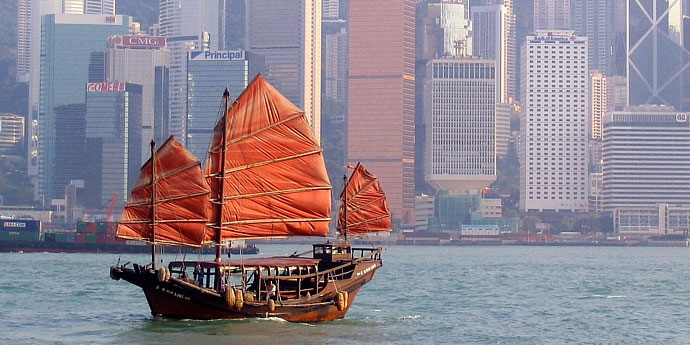
Right now the ideal dimensions for an article image is 690px by 345px. This gives a nice 2:1 aspect ratio for the visitor. Like the image below:
There are two ways to do this, either resize and reduce the file size as you would for the Featured Image or resize the image inside of WordPress.
If you resized and reduced your image using online tools then just:
- Click the “Add Media”
- Click “Upload Files”
- Edit the ATTACHMENT DETAILS
- Change the Title to something unique that will help tie the image to the article. i.e. “how-to-post-chinese-junk”. This will help us track and replace images.
- Add a Caption that will display below the image
- Add Alt-Text. This should be a description of what the image actually is.
- Scroll down set the ATTACHMENT DISPLAY SETTINGS Size to Large (690×345)
- Click “Insert Into Post”
You should have a nice image in your article now.
If you want to try to use WordPress to resize, crop or flip the image then follow these directions: https://www.seedprod.com/how-to-resize-an-image-in-wordpress/
All of the same settings that you use when inserting your own resized images will also apply.
Exceptions: GIFS and memes may not be resizeable to ideal dimensions. Work with what you have.
Adding An Image Gallery
If you need to insert a set of images that are all related then follow this gallery:
You should not need to adjust the Gallery Settings unless you have 4 images and it will look strange having rows of 3 with 4 images. Like the example above.
Using Pull Quotes
If you quote another source then you should link to that article using the name of source and put the quote from the source in a Blockquote, such as:
A perfect example of this is the blockquote. The little tool in your editor window that is a quote mark and basically formats some text to look similar to the old pull quote from print days.
The formatting sucks right now. This will be worked on.
Categories and Tags
Categories
Right now Contributors can only select from existing Categories.
- If applicable, select ONLY the lowest level Categories within a given Category tree
- .i.e. If the article is about the Aquaman movie character only select “Aquaman” within the Franchises > DCUE > Aquaman Category tree
- i.e. If the article is about Aquaman movie character only select “Comic Book” with the Genres > Comic Book Category tree
- If applicable, select ALL the top-level childless Categories (Categories with no tree) that apply.i.e. If the article is a Review about the Aquaman movie select both “Movies” and “Reviews”
Tags
Any contributor can add Tags. Just make sure there is not an existing tag already in the system.
Creating New Tags
- Uppercase all words in the Tag.
- Use full names of actors, character, titles, etc
- Don’t create Tags that combine two concepts or two other tags.
- i.e. “Star Wars” and “The Last Jedi” should be two separate tags.


